前言 此项目算是一个demo,用于整合之前了解的技术。
并不注重前端 只在乎与前端的一些交互 所以使用了框架vue-elementsui-admin
先安装一个前端框架 选择element 网站快速成型工具
快速集成就决定是你了
由于时通过vue的脚手架vue-cli集成的工具包所以需要先安装cli
三部曲
1
2
3
npm install cooking-cli -g 安装webapck加强版构建工具npm install 安装依赖npm run dev 启动项目
引入通过vue-cli生成的Element UI入门套件 这里并不是必须
https://github.com/ElementUI/element-cooking-starter
查看是否安装成功
也可以查看npm组件地址的方式去看
使用element项目模板 光的就带了一些工具包
https://github.com/ElementUI/element-cooking-starter
1
2
3
npm install 安装依赖run dev 启动项目run build 构建项目
这里启动遇到成功 但是无法访问 报错
1 { parser : "babylon" } is deprecated; we now treat it as { parser : "babel" }
安装一下prettier
https://prettier.io/docs/en/install.html
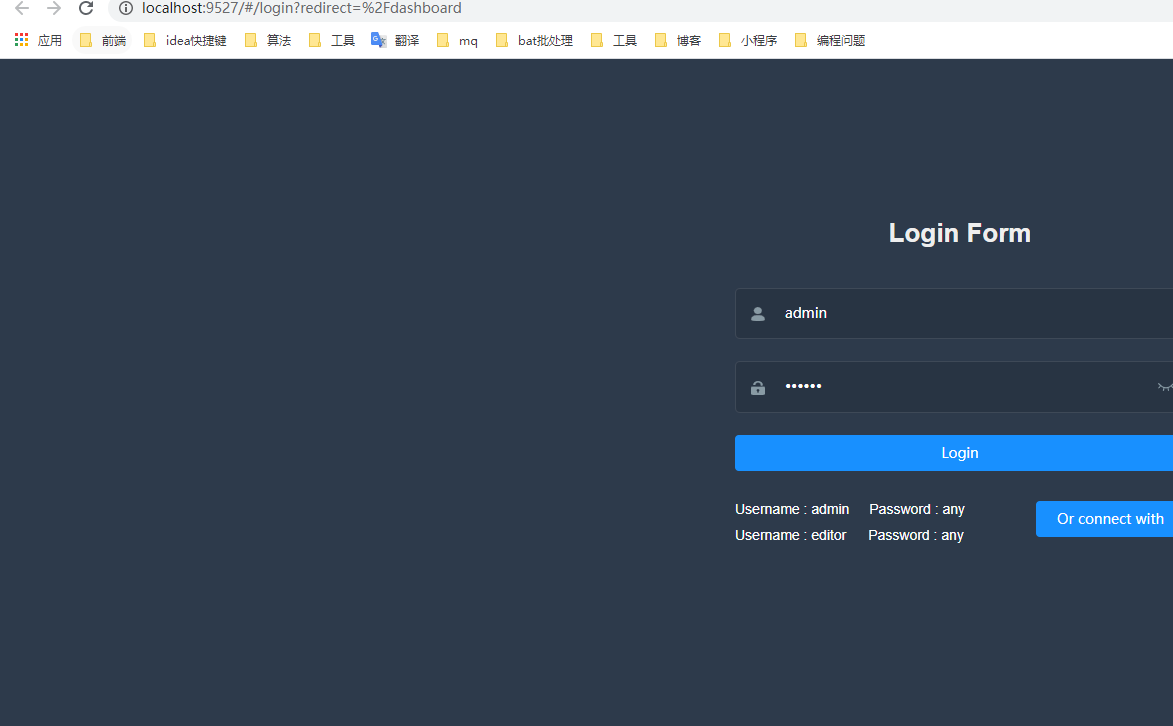
使用vue+element项目
1 https://gi thub.com/PanJiaChen/ vue-element-admin.git
日常clone没啥问题
vue有三宝 先install 后run dev 还有build
自动启动
有一点百度看了下 这vue如何集成整合进javaweb里面
我寻思这前后端分离我为什么要把东西搞一块呢???
vue改了 build一下再run 不影响啊 写个bat
oh year ♂
持续更新。。
4.19 这个github的vue项目有个分支 支持国际版也就是语言切换
分支地址
改一下前端细节 查看中文文档
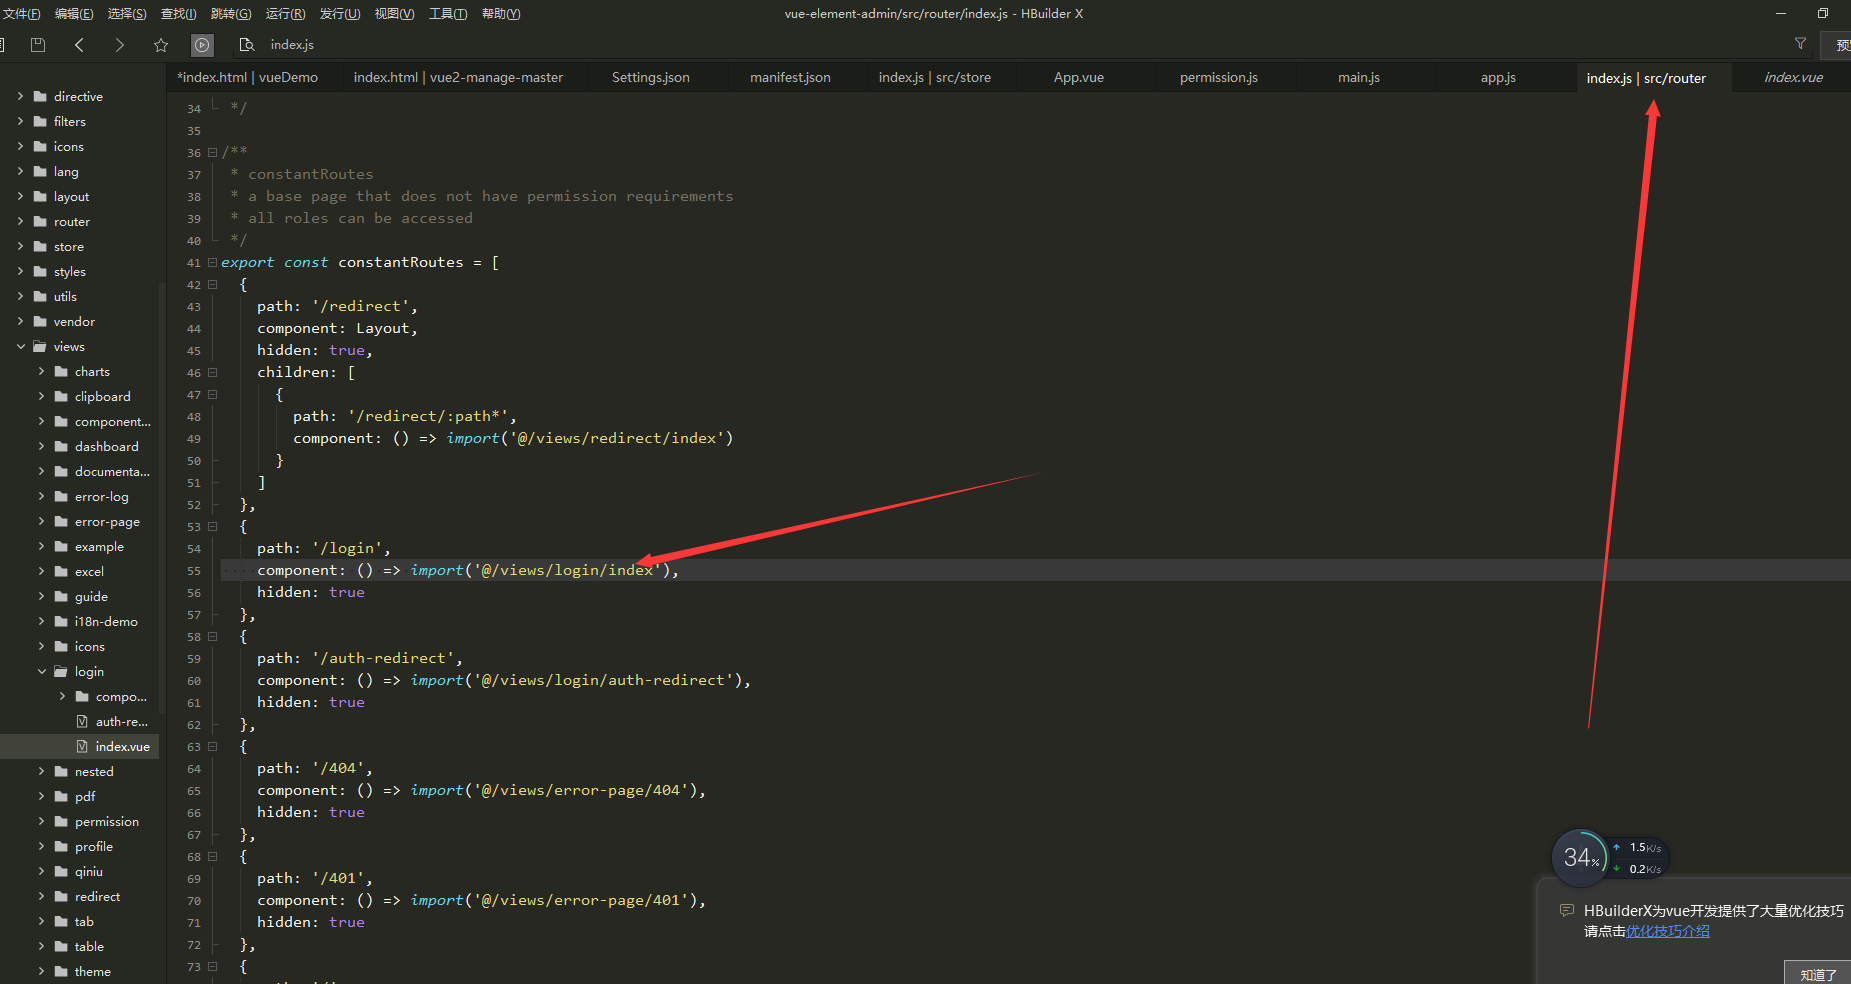
找到登录页面的代码 @/router/index.js 也就是路由
把这里注释掉
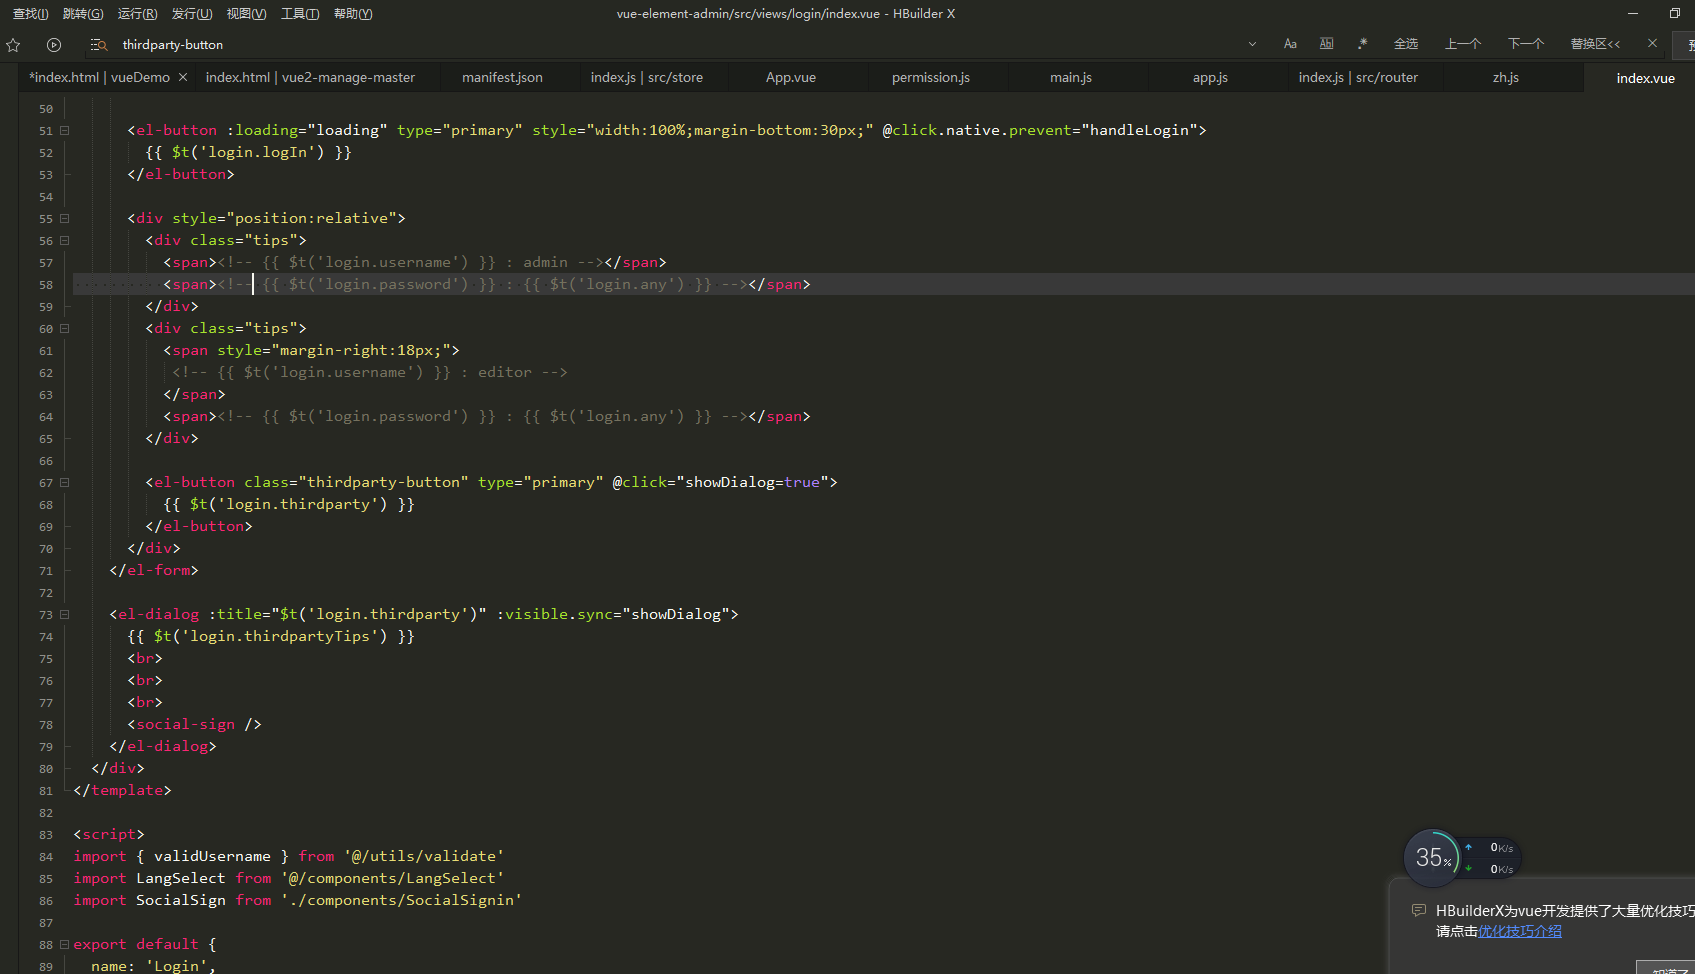
因为没有自带验证码
这里引用vue的验证码组件vue2-verify
基于https://github.com/Hibear/verify的验证码项目
2020-06-07 更新 搭建后台 创建一个springboot项目 配置maven依赖(现已经加入的) 1 2 3 4 5 6 7 8 9 10 11 12 13 14 15 16 17 18 19 20 21 22 23 24 25 26 27 28 29 30 31 32 33 34 35 36 37 38 39 40 41 42 43 44 45 46 47 48 49 50 51 52 53 54 55 56 57 58 59 60 61 62 63 64 65 66 67 68 69 70 71 72 73 74 75 76 77 78 79 80 81 82 83 84 85 86 87 88 89 90 91 92 93 94 95 96 97 98 99 100 101 102 103 104 105 106 107 108 109 110 111 112 113 114 115 116 117 118 119 120 121 122 123 124 125 126 127 128 129 130 131 132 133 134 135 136 137 138 139 140 141 142 143 144 145 146 147 148 149 150 151 152 153 154 155 156 157 158 159 160 161 162 163 164 165 166 167 168 169 170 171 172 173 174 175 176 177 178 179 180 181 182 183 184 185 186 187 188 189 190 191 192 193 194 195 196 197 198 199 200 201 202 203 204 205 206 207 208 209 210 211 212 213 214 215 216 217 218 219 220 221 222 223 224 225 226 227 228 229 230 231 232 233 234 235 236 237 238 239 240 241 242 243 244 245 246 247 248 249 250 251 252 253 254 255 256 257 258 259 260 261 262 263 264 265 266 267 268 269 270 271 272 273 274 275 276 277 278 <?xml version="1.0" encoding="UTF-8"?> <project xmlns ="http://maven.apache.org/POM/4.0.0" xmlns:xsi ="http://www.w3.org/2001/XMLSchema-instance" xsi:schemaLocation ="http://maven.apache.org/POM/4.0.0 https://maven.apache.org/xsd/maven-4.0.0.xsd" > <modelVersion > 4.0.0</modelVersion > <parent > <groupId > org.springframework.boot</groupId > <artifactId > spring-boot-starter-parent</artifactId > <version > 2.2.6.RELEASE</version > <relativePath /> </parent > <groupId > com.xia</groupId > <artifactId > zhb</artifactId > <version > 0.0.1-SNAPSHOT</version > <name > zhb</name > <description > Demo project for Spring Boot</description > <properties > <project.build.sourceEncoding > UTF-8</project.build.sourceEncoding > <java.version > 1.8</java.version > </properties > <build > <resources > <resource > <directory > src/main/java</directory > <includes > <include > **/*.xml</include > </includes > </resource > </resources > <plugins > <plugin > <groupId > org.springframework.boot</groupId > <artifactId > spring-boot-maven-plugin</artifactId > </plugin > <plugin > <groupId > org.apache.maven.plugins</groupId > <artifactId > maven-compiler-plugin</artifactId > <version > 3.8.0</version > <configuration > <source > ${java.version}</source > <target > ${java.version}</target > <encoding > ${project.build.sourceEncoding}</encoding > </configuration > </plugin > <plugin > <groupId > org.codehaus.mojo</groupId > <artifactId > exec-maven-plugin</artifactId > <version > 1.3.2</version > <executions > <execution > <goals > <goal > java</goal > </goals > </execution > </executions > <configuration > <mainClass > com.example.Shiro.Tutorial</mainClass > </configuration > </plugin > </plugins > </build > <dependencies > <dependency > <groupId > org.springframework.boot</groupId > <artifactId > spring-boot-starter</artifactId > </dependency > <dependency > <groupId > org.springframework.boot</groupId > <artifactId > spring-boot-starter-web</artifactId > <exclusions > <exclusion > <groupId > org.springframework.boot</groupId > <artifactId > spring-boot-starter-logging</artifactId > </exclusion > </exclusions > </dependency > <dependency > <groupId > org.springframework.boot</groupId > <artifactId > spring-boot-starter-test</artifactId > <scope > test</scope > <exclusions > <exclusion > <groupId > org.junit.vintage</groupId > <artifactId > junit-vintage-engine</artifactId > </exclusion > <exclusion > <groupId > org.springframework.boot</groupId > <artifactId > spring-boot-starter-logging</artifactId > </exclusion > <exclusion > <artifactId > logback-classic</artifactId > <groupId > ch.qos.logback</groupId > </exclusion > </exclusions > </dependency > <dependency > <groupId > org.springframework.boot</groupId > <artifactId > spring-boot-starter-log4j2</artifactId > </dependency > <dependency > <groupId > </groupId > <artifactId > </artifactId > <optional > </optional > </dependency > <dependency > <groupId > </groupId > <artifactId > </artifactId > <version > </version > </dependency > <dependency > <groupId > </groupId > <artifactId > </artifactId > <version > </version > </dependency > <dependency > <groupId > </groupId > <artifactId > </artifactId > <version > </version > </dependency > <dependency > <groupId > org.apache.shiro</groupId > <artifactId > shiro-spring</artifactId > <version > 1.4.0</version > </dependency > <dependency > <groupId > org.apache.shiro</groupId > <artifactId > shiro-core</artifactId > <version > 1.2.2</version > </dependency > <dependency > <groupId > org.apache.shiro</groupId > <artifactId > shiro-web</artifactId > <version > 1.3.2</version > </dependency > <dependency > <groupId > org.projectlombok</groupId > <artifactId > lombok</artifactId > <version > 1.18.4</version > <scope > provided</scope > </dependency > <dependency > <groupId > org.springframework.boot</groupId > <artifactId > spring-boot-starter-logging</artifactId > <exclusions > <exclusion > <groupId > *</groupId > <artifactId > *</artifactId > </exclusion > </exclusions > </dependency > <dependency > <groupId > com.ramostear</groupId > <artifactId > Happy-Captcha</artifactId > <version > 1.0.1</version > </dependency > <dependency > <groupId > org.springframework.boot</groupId > <artifactId > spring-boot-starter-thymeleaf</artifactId > </dependency > </dependencies > </project >
加入log4j2 1 2 3 4 5 6 7 8 9 10 11 12 13 14 15 16 17 18 19 20 21 22 23 24 25 26 27 28 29 30 31 32 33 34 35 36 37 38 39 40 41 42 43 44 45 46 47 48 49 50 51 52 53 54 55 56 57 58 59 60 61 62 63 64 65 66 67 68 69 70 71 72 73 74 75 76 77 78 79 80 81 82 83 84 85 86 87 88 89 90 91 92 93 94 95 96 97 98 99 100 101 102 103 104 <?xml version="1.0" encoding="UTF-8"?> <configuration monitorInterval ="5" > <Properties > <property name ="LOG_PATTERN" value ="%date{HH:mm:ss.SSS} [%thread] %-5level %logger{36} - %msg%n" /> <property name ="FILE_PATH" value ="E:/tool/ideaIU-2018.2.5/log4j2" /> <property name ="FILE_NAME" value ="zhb" /> </Properties > <appenders > <console name ="Console" target ="SYSTEM_OUT" > <PatternLayout pattern ="${LOG_PATTERN}" /> <ThresholdFilter level ="info" onMatch ="ACCEPT" onMismatch ="DENY" /> </console > <File name ="Filelog" fileName ="E:/tool/ideaIU-2018.2.5/log4j2/log.log" append ="false" > <PatternLayout pattern ="${LOG_PATTERN}" /> </File > <RollingFile name ="RollingFileInfo" fileName ="${FILE_PATH}/info.log" filePattern ="${FILE_PATH}/${FILE_NAME}-INFO-%d{yyyy-MM-dd}_%i.log.gz" > <ThresholdFilter level ="info" onMatch ="ACCEPT" onMismatch ="DENY" /> <PatternLayout pattern ="${LOG_PATTERN}" /> <Policies > <TimeBasedTriggeringPolicy interval ="1" /> <SizeBasedTriggeringPolicy size ="10MB" /> </Policies > <DefaultRolloverStrategy max ="15" /> </RollingFile > <RollingFile name ="RollingFileWarn" fileName ="${FILE_PATH}/warn.log" filePattern ="${FILE_PATH}/${FILE_NAME}-WARN-%d{yyyy-MM-dd}_%i.log.gz" > <ThresholdFilter level ="warn" onMatch ="ACCEPT" onMismatch ="DENY" /> <PatternLayout pattern ="${LOG_PATTERN}" /> <Policies > <TimeBasedTriggeringPolicy interval ="1" /> <SizeBasedTriggeringPolicy size ="10MB" /> </Policies > <DefaultRolloverStrategy max ="15" /> </RollingFile > <RollingFile name ="RollingFileError" fileName ="${FILE_PATH}/error.log" filePattern ="${FILE_PATH}/${FILE_NAME}-ERROR-%d{yyyy-MM-dd}_%i.log.gz" > <ThresholdFilter level ="error" onMatch ="ACCEPT" onMismatch ="DENY" /> <PatternLayout pattern ="${LOG_PATTERN}" /> <Policies > <TimeBasedTriggeringPolicy interval ="1" /> <SizeBasedTriggeringPolicy size ="10MB" /> </Policies > <DefaultRolloverStrategy max ="15" /> </RollingFile > </appenders > <loggers > <root level ="info" > <appender-ref ref ="Console" /> <appender-ref ref ="Filelog" /> <appender-ref ref ="RollingFileInfo" /> <appender-ref ref ="RollingFileWarn" /> <appender-ref ref ="RollingFileError" /> </root > </loggers > </configuration >
详情可以看 https://www.cnblogs.com/keeya/p/10101547.html#%E4%B8%BA%E4%BB%80%E4%B9%88%E9%80%89%E7%94%A8log4j2
加入lombok 不细说了
配置全局yml 1 2 3 4 5 6 7 8 9 10 11 mybatis: mapper-locations: classpath:mapper/*Dao.xml typeAliasesPackage: com.xia.zhb.entity server: port: 8089 spring: datasource: driver-class-name: com.mysql.jdbc.Driver url: jdbc:mysql://127.0.0.1:3306/zhb?useUnicode=true&characterEncoding=UTF-8 username: root password: root
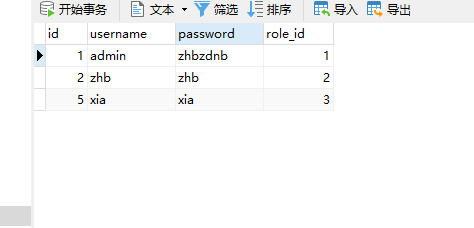
创建数据库zhb 创建表 1 2 3 4 5 6 7 8 9 10 11 12 13 14 15 16 17 18 19 20 21 22 23 24 25 CREATE TABLE `t_role` (int (11 ) NOT NULL AUTO_INCREMENT COMMENT '主键' ,varchar (20 ) DEFAULT NULL COMMENT '角色名称' ,PRIMARY KEY (`id`)= InnoDB AUTO_INCREMENT= 4 DEFAULT CHARSET= utf8CREATE TABLE `t_user` (int (11 ) NOT NULL AUTO_INCREMENT COMMENT '用户主键' ,varchar (20 ) NOT NULL COMMENT '用户名' ,varchar (20 ) NOT NULL COMMENT '密码' ,int (11 ) DEFAULT NULL COMMENT '外键关联role表' ,PRIMARY KEY (`id`),CONSTRAINT `t_user_ibfk_1` FOREIGN KEY (`role_id`) REFERENCES `t_role` (`id`)= InnoDB AUTO_INCREMENT= 4 DEFAULT CHARSET= utf8CREATE TABLE `t_permission` (int (11 ) NOT NULL AUTO_INCREMENT COMMENT '主键' ,varchar (50 ) NOT NULL COMMENT '权限名' ,int (11 ) DEFAULT NULL COMMENT '外键关联role' ,PRIMARY KEY (`id`),CONSTRAINT `t_permission_ibfk_1` FOREIGN KEY (`role_id`) REFERENCES `t_role` (`id`)= InnoDB AUTO_INCREMENT= 3 DEFAULT CHARSET= utf8
使用easycode快速生成代码 以及开启springboot热部署 详情看
https://www.zhbzdnb.com/2019/12/29/%E5%85%B3%E4%BA%8E%E4%BB%A3%E7%A0%81%E6%95%8F%E6%8D%B7%E5%92%8C%E8%A7%84%E8%8C%83/
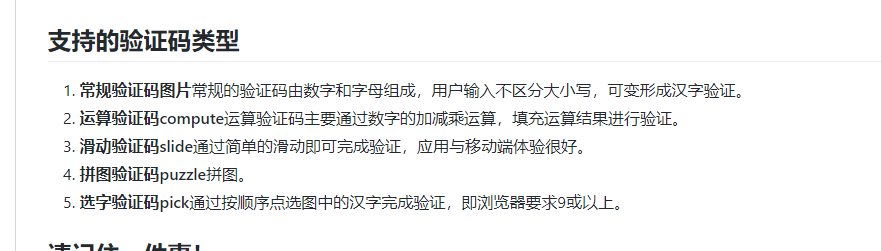
使用生成验证码组件 项目地址
https://github.com/ramostear/Happy-Captcha
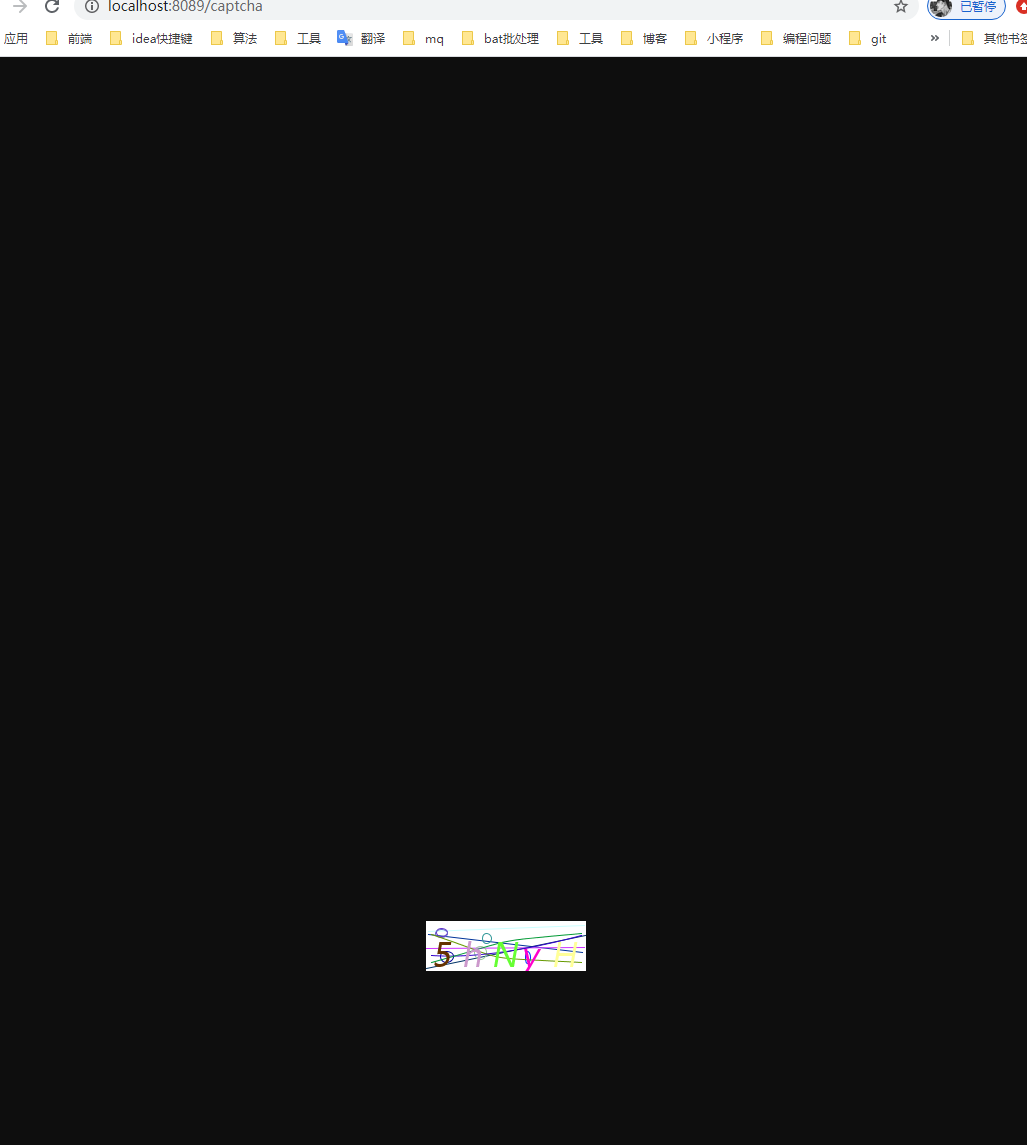
1 2 3 4 5 @GetMapping("/captcha") public void happyCaptcha (HttpServletRequest reqeust, HttpServletResponse response)
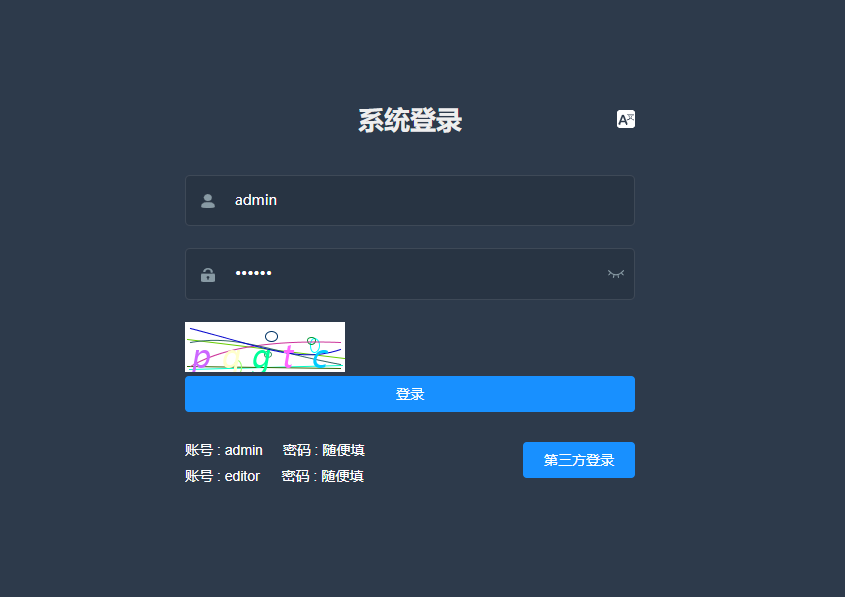
效果如图
加入安全框架shiro 主要的俩类
自定义 Realm 1 2 3 4 5 6 7 8 9 10 11 12 13 14 15 16 17 18 19 20 21 22 23 24 25 26 27 28 29 30 31 32 33 34 35 36 37 38 39 40 41 42 43 44 45 46 47 48 49 50 51 52 53 54 55 56 57 58 package com.xia.zhb.shiro;import com.xia.zhb.entity.TUser;import com.xia.zhb.service.TUserService;import org.apache.shiro.SecurityUtils;import org.apache.shiro.authc.AuthenticationException;import org.apache.shiro.authc.AuthenticationInfo;import org.apache.shiro.authc.AuthenticationToken;import org.apache.shiro.authc.SimpleAuthenticationInfo;import org.apache.shiro.authz.AuthorizationInfo;import org.apache.shiro.authz.SimpleAuthorizationInfo;import org.apache.shiro.realm.AuthorizingRealm;import org.apache.shiro.subject.PrincipalCollection;import javax.annotation.Resource;import java.util.HashSet;import java.util.Set;public class MyRealm extends AuthorizingRealm @Resource private TUserService tuserService;@Override protected AuthorizationInfo doGetAuthorizationInfo (PrincipalCollection principalCollection) new SimpleAuthorizationInfo();new HashSet<String>();new HashSet<String>();return authorizationInfo;@Override protected AuthenticationInfo doGetAuthenticationInfo (AuthenticationToken authenticationToken) throws AuthenticationException if (user != null ) {"user" , user);new SimpleAuthenticationInfo(user.getUsername(), user.getPassword(), "myRealm" );return authcInfo;else {return null ;
Shiro 配置 1 2 3 4 5 6 7 8 9 10 11 12 13 14 15 16 17 18 19 20 21 22 23 24 25 26 27 28 29 30 31 32 33 34 35 36 37 38 39 40 41 42 43 44 45 46 47 48 49 50 51 52 53 54 55 56 57 58 59 60 61 62 63 64 65 66 67 68 69 70 71 72 73 74 75 76 77 78 79 80 81 82 83 84 85 86 87 88 89 90 91 package com.xia.zhb.shiro;import org.apache.shiro.mgt.SecurityManager;import org.apache.shiro.spring.web.ShiroFilterFactoryBean;import org.apache.shiro.web.mgt.DefaultWebSecurityManager;import org.slf4j.Logger;import org.slf4j.LoggerFactory;import org.springframework.context.annotation.Bean;import org.springframework.context.annotation.Configuration;import java.util.LinkedHashMap;import java.util.Map;@Configuration public class ShiroConfig private static final Logger logger = LoggerFactory.getLogger(ShiroConfig.class);@Bean public MyRealm myAuthRealm () new MyRealm();"====myRealm注册完成=====" );return myRealm;@Bean public SecurityManager securityManager () new DefaultWebSecurityManager(myAuthRealm());"====securityManager注册完成====" );return securityManager;@Bean public ShiroFilterFactoryBean shiroFilter (SecurityManager securityManager) new ShiroFilterFactoryBean();"/login" );"/success" );"/unauthorized" );new LinkedHashMap<String,String>();"/login" , "anon" );"====shiroFilterFactoryBean注册完成====" );return shiroFilterFactoryBean;
vue+elementui集成到springboot 将之前的前端验证码注释加入以下代码
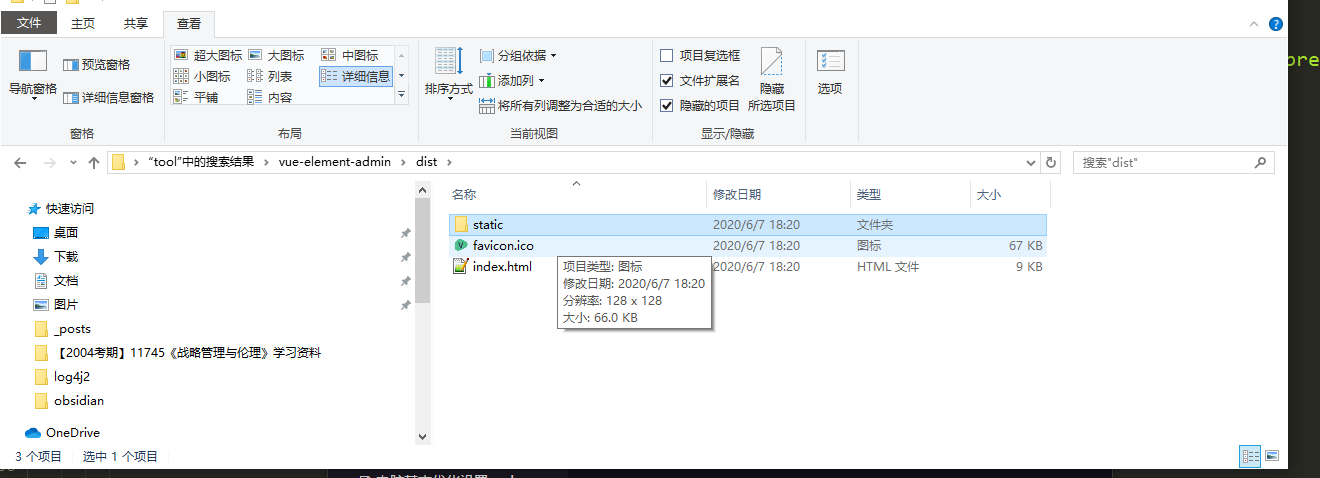
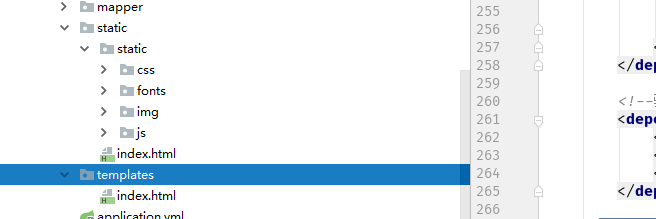
将vue项目bulid
此文件夹全部放置到后台,将index.html放一份到templates文件夹
创建进入类 1 2 3 4 5 6 7 8 @Controller @RequestMapping("") public class IndexController @RequestMapping("/index") public String index () return "index" ;
访问结果
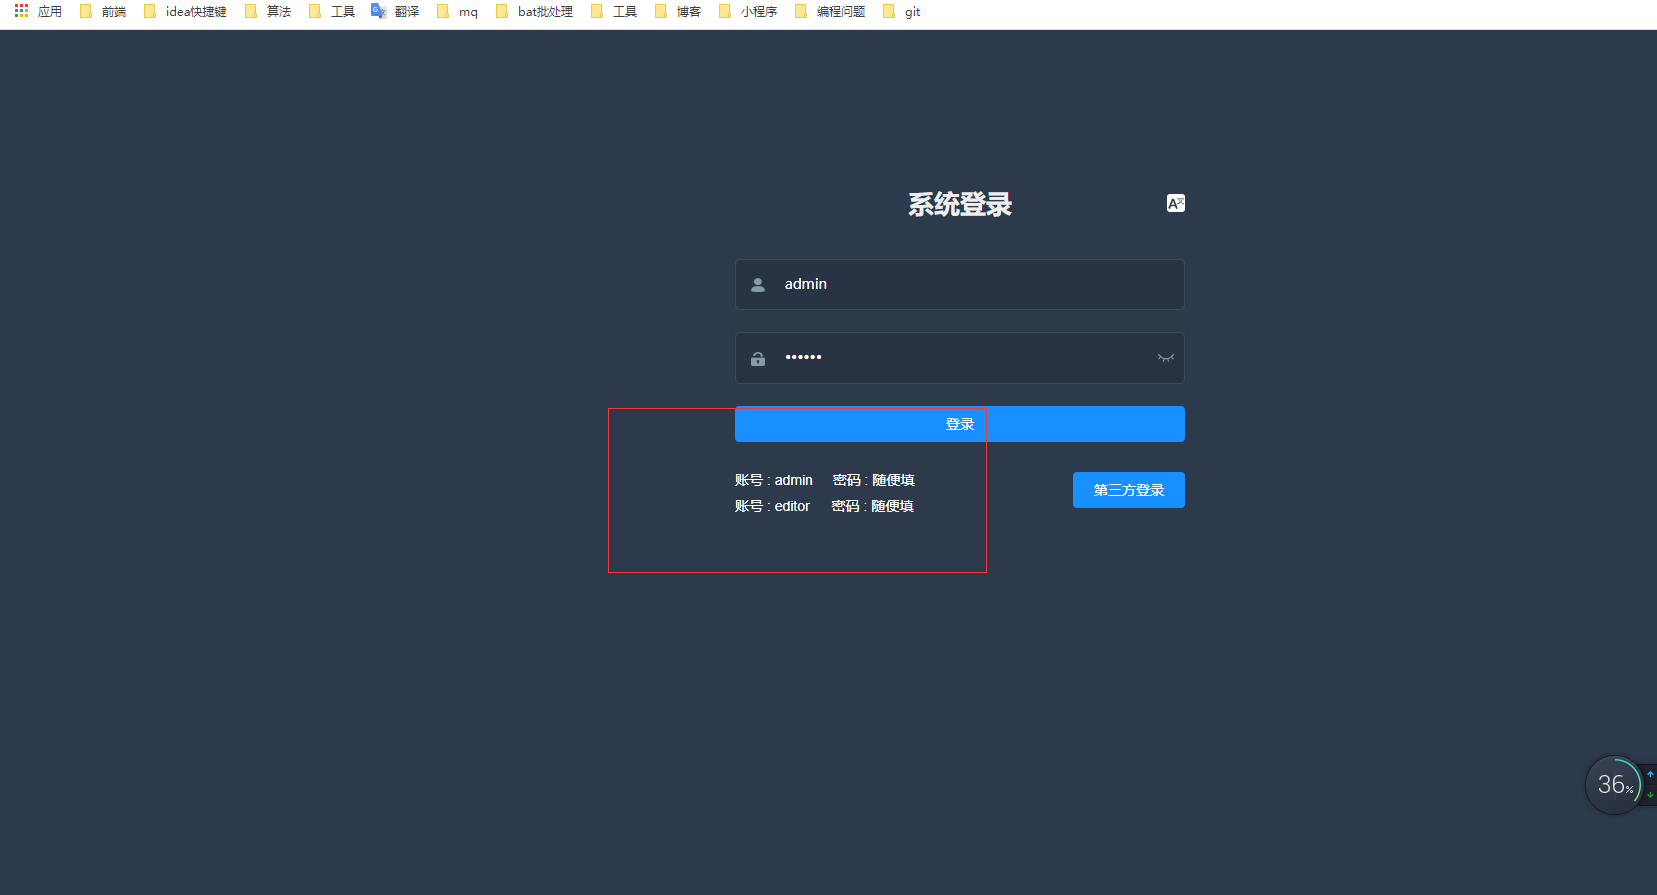
6.14更新 更改vue项目 api 和 前缀配置文件
期间遇到问题 当我尝试将vue的前缀配置文件改成zhb
并将后台springboot加入全局前缀zhb时
vue有些文件引入时也用了zhb这个前缀 所以我现在先将vue项目和springboot的配置改为 /
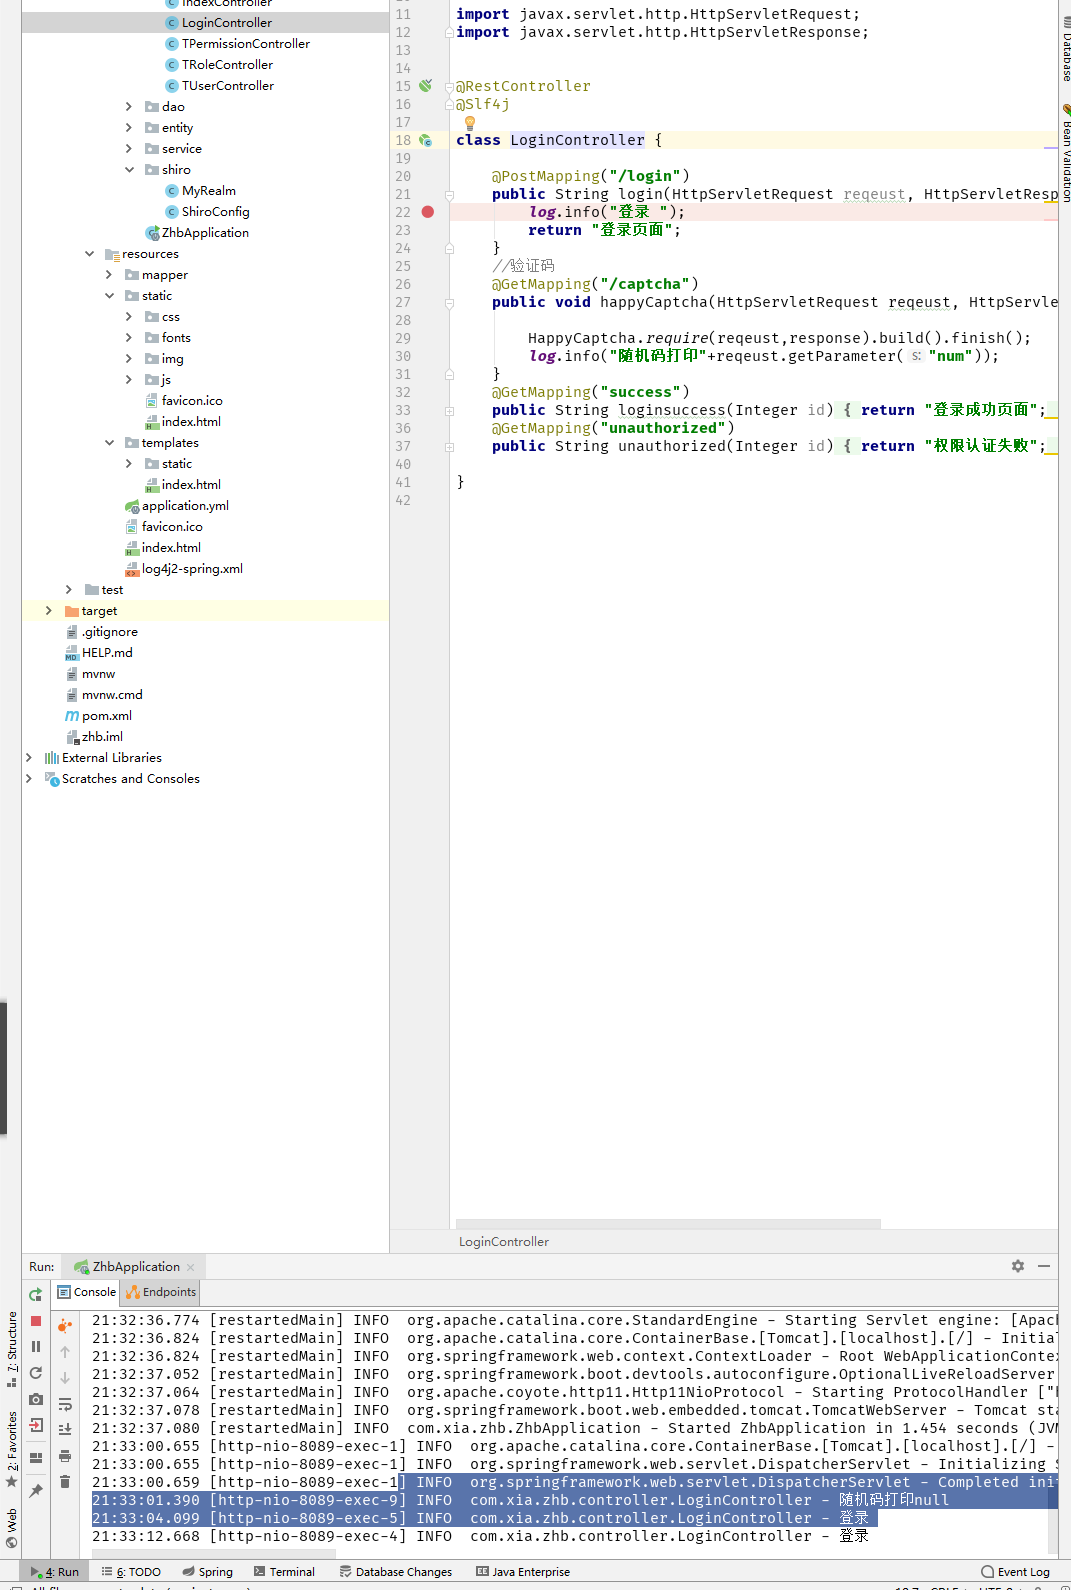
给后台login方法设置log
更改后台代码 1 2 3 4 5 6 7 8 9 10 11 12 13 14 15 16 17 18 19 20 21 22 23 24 25 @PostMapping("/login") public String login (@RequestBody TUser user) "登录 " );new UsernamePasswordToken(user.getUsername(),user.getPassword());try {catch (UnknownAccountException uae) {"用户名和密码不匹配" );catch (IncorrectCredentialsException ice) {"用户名和密码不匹配" );catch (LockedAccountException lae) {"LockedAccountException" );catch (ExcessiveAttemptsException eae) {"ExcessiveAttemptsException" );catch (AuthenticationException ae) {"AuthenticationException" );return "登录页面" ;
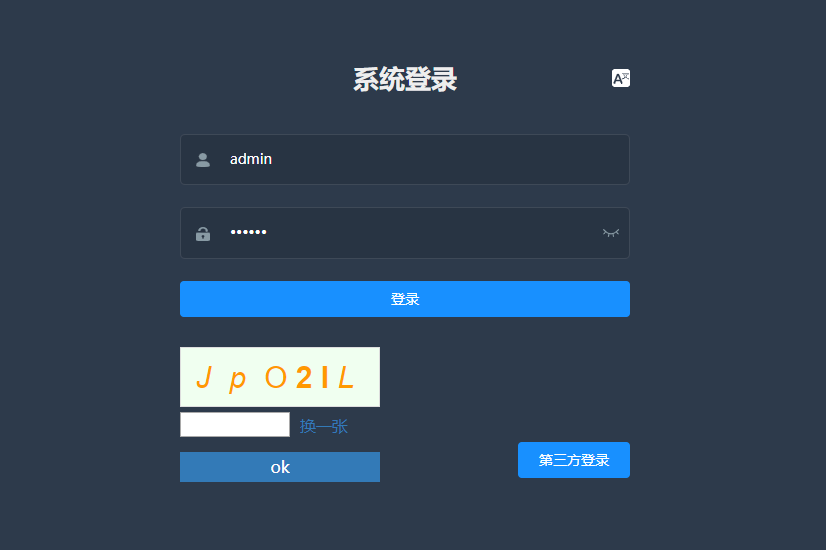
因为vue-elementui-admin这个框架关于密码默认封装了密码需要6位
直接去数据库改一下密码
成功登入
有些好奇所以去查看shiro的login方法实现 查看实现https://blog.csdn.net/u010003835/article/details/79036666
ctrl进入了DelegatingSubject
具体代码
1 2 3 4 5 6 7 8 9 10 11 12 13 14 15 16 17 18 19 20 21 22 23 24 25 26 27 28 29 30 31 32 33 34 35 36 public void login (AuthenticationToken token) throws AuthenticationException this .clearRunAsIdentitiesInternal();this .securityManager.login(this , token);null ;if (subject instanceof DelegatingSubject) {else {if (principals != null && !principals.isEmpty()) {this .principals = principals;this .authenticated = true ;if (token instanceof HostAuthenticationToken) {if (host != null ) {this .host = host;false );if (session != null ) {this .session = this .decorate(session);else {this .session = null ;else {"Principals returned from securityManager.login( token ) returned a null or empty value. This value must be non null and populated with one or more elements." ;throw new IllegalStateException(msg);
通过this.securityManager.login(this, token);
使用了继承SessionsSecurityManager的DefaultSecurityManager的login方法
代码
1 2 3 4 5 6 7 8 9 10 11 12 13 14 15 16 17 18 19 20 21 22 public Subject login (Subject subject, AuthenticationToken token) throws AuthenticationException try {this .authenticate(token);catch (AuthenticationException var7) {try {this .onFailedLogin(token, ae, subject);catch (Exception var6) {if (log.isInfoEnabled()) {"onFailedLogin method threw an exception. Logging and propagating original AuthenticationException." , var6);throw var7;this .createSubject(token, info, subject);this .onSuccessfulLogin(token, info, loggedIn);return loggedIn;
实际调用DefaultSecurityManager.onFailedLogin(AuthenticationToken token, AuthenticationException ae, Subject subject)->DefaultSecurityManager.(AuthenticationToken token, AuthenticationException ex, Subject subject)->RememberMeManager接口的实现AbstractRememberMeManager类的onFailedLogin方法此方法调用CookieRememberMeManager.forgetIdentity
其具体代码
1 2 3 4 5 6 7 8 protected void forgetIdentity (Subject subject) if (WebUtils.isHttp(subject)) {this .forgetIdentity(request, response);
只是粗略看一下 因为已经配置好了自定义Realm和ShiroConfig
详情看
https://www.zhbzdnb.com/2020/05/04/shiro%E7%AE%80%E5%8D%95%E5%85%A5%E9%97%A8%E5%AE%9E%E4%BE%8B/
6.18更新 因为是vue新手,直接使用vue-elementui-admin 使得我很多进度推进缓慢 所以我改用差不多的前端vue+elementui项目https://gitee.com/y_project/RuoYi-Vue/blob/master/ruoyi-ui
安装其依赖遇到问题此文章解决了我的问题http://www.xiwenblog.com/archives/1989
将项目拉下啦后;接上验证码、接上登录接口
进入成功
因为拥有其后台代码 改写login代码
1 2 3 4 5 6 7 8 9 10 11 12 13 14 15 16 17 18 19 20 21 22 23 24 25 26 27 28 29 30 31 @PostMapping("/login") public AjaxResult login (String username, String password) "登录 " );new UsernamePasswordToken(username,password);try {catch (UnknownAccountException uae) {"用户名和密码不匹配" );return ajaxResult=AjaxResult.error("用户名和密码不匹配" );catch (IncorrectCredentialsException ice) {"用户名和密码不匹配" );return error("用户名和密码不匹配" );catch (LockedAccountException lae) {"LockedAccountException" );return error("用户名和密码不匹配" );catch (ExcessiveAttemptsException eae) {"ExcessiveAttemptsException" );return error("用户名和密码不匹配" );catch (AuthenticationException ae) {"AuthenticationException" );return error("用户名和密码不匹配" );"token" , token.getCredentials());return ajaxResult;
关于shiro的AuthenticationTokenhttps://www.jianshu.com/p/9ac577427b44
这里遇到问题 当我用若依的后台返回参数的方式返回其结果无效
他是使用自定义的一个令牌 我是使用shiro的AuthenticationToken.getCredentials()
找到前端的login方法 打上断点和log
1 2 3 4 5 6 7 8 9 10 11 12 13 14 15 16 17 Login ({ commit }, userInfo )const username = userInfo.username.trim()const password = userInfo.passwordconst code = userInfo.codeconst uuid = userInfo.uuidreturn new Promise ((resolve, reject ) => {res =>console .log(res)debugger 'SET_TOKEN' , res.token)error =>
12.了明天再研究 最近工作很忙
6.21更新 使用nginx配置跨域和转发 nginx配置文件
1 2 3 4 5 6 7 8 9 10 11 12 13 14 15 16 17 18 19 20 21 22 23 24 25 26 27 28 29 30 31 32 33 34 35 36 37 38 39 40 41 42 43 44 45 46 47 48 49 50 51 52 53 54 55 56 57 58 59 60 61 62 63 64 65 66 67 68 69 70 71 72 73 74 75 76 77 78 79 80 81 82 83 84 85 86 87 88 89 90 91 92 93
更改验证码相关代码
1 2 3 4 5 6 7 8 9 10 11 getCode() {
连接没有问题了,但是还是跳转有问题,原因是后台以及前端的token机制。
后台返回的token并不是前端规范的token。
继续研究
关于其机制 查看
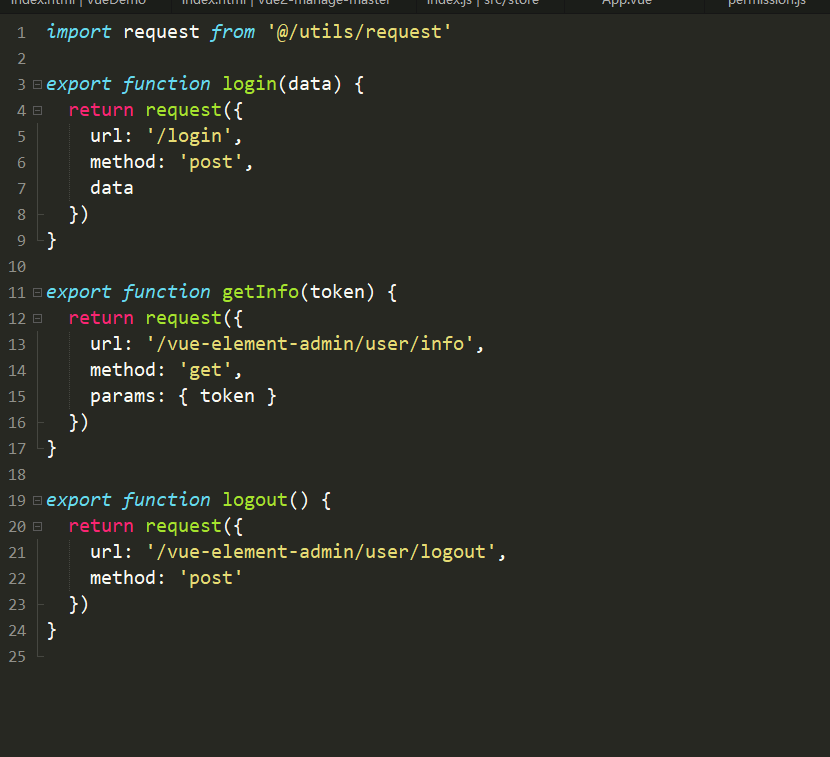
1 2 3 4 5 6 7 8 9 10 11 12 13 14 15 16 17 18 19 20 21 22 23 24 25 26 27 28 29 30 31 32 33 34 35 36 37 38 39 40 41 42 43 44 45 46 47 48 49 50 51 52 53 54 55 56 57 58 59 60 61 62 63 64 65 import router from './router' import store from './store' import { Message } from 'element-ui' import NProgress from 'nprogress' import 'nprogress/nprogress.css' import { getToken } from '@/utils/auth' showSpinner : false })const whiteList = ['/login' , '/auth-redirect' , '/bind' , '/register' ](to, from , next ) => {if (getToken()) {if (to.path === '/login' ) {path : '/' })else {if (store.getters.roles.length === 0 ) {'GetInfo' ).then(res =>const roles = res.roles'GenerateRoutes' , { roles }).then(accessRoutes =>replace : true }) err =>'FedLogOut' ).then(() => {path : '/' })else {else {if (whiteList.indexOf(to.path) !== -1 ) {else {`/login?redirect=${to.path} ` ) () => {
我并不想去照搬若依的后台代码,我需要自己去实现。
7.5 将若依前后端全部都给发布 打断点 了解了其token的原理,前端和后台任何交互都带着token 。
怎么去实现验证token的拦截器
如何生成token
抽时间完成了关于shiro token的操作
shiro关于token的一些操作